In This Topic
Many prices in a project have non-design (extra) costs associated with them such as freight, installations, rip-out, third party contractors.
CabMaster manages these costs in the List View. The costs can be added to your drawing/project using the following methods:-
- Manually - on a line by line basis, recommended only for one off costs.
- Template - a pre-built pricing template is recommend for recurring costs.
- Additional Elements - Misc Addition cabinet can be used to add any additional item that needs to be part of the overall cost of a job.
- This will be discussed in a separate tutorial - If used, the Additional category will need to the ticked on the Pricing/Markups page (see note).
The following tutorials discuss (1) the creation of extra items, which can then (2) be saved as a template and applied to future drawings.
Since many of the non-design costs are recurring it is both time consuming and dangerous to add line items in manually, so the manual addition of extra items should only for be used for one off costs.
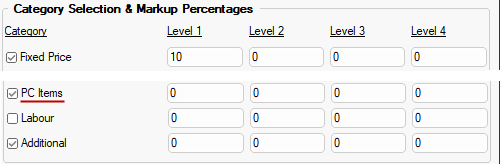
Pricing/Markups page
Ensure you have the PC Items category ticked and any other required Categories.
- To designate the Sell price you need to set the Level Markup percentages.
- Tutorial 1 also uses the Fixed Price category and markup of 10%.
- The Sell price is determined using the Pricing Schedule nominated for the selected customer when you start a new project/.

Click to view Job Setup > Client page of the Drawing Properties
Pricing > Pricing/Markups page - Click to Expand
Tutorial 1 Manual Creation
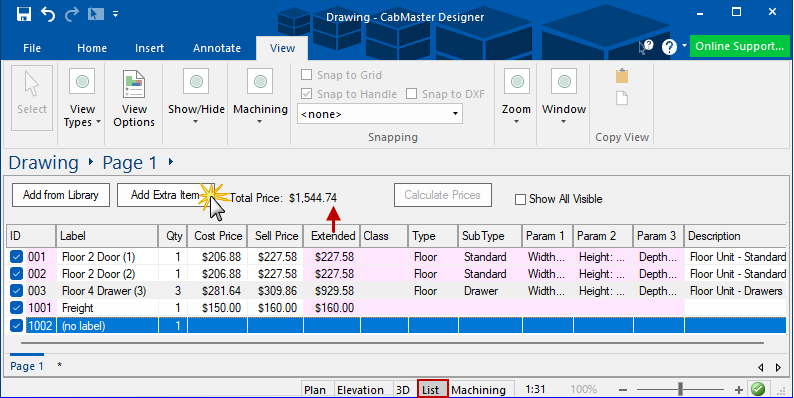
Change the view type of your drawing to List View, as shown below.
This process applies to creating one off costs, as discussed here, or creating extra items that can be saved as a template, discussed in
Tutorial 2.
Step 1
Add Extra Item
In List View you will notice that there is an Add Extra Item button.
- Click on Add Extra Item button
- A new line item (no label) is placed in the List View.
Step 2
Amend Item Details
Since we are manually adding this line we now need to edit the line item to add in data that will included in our costing.
- One way is to simply click on the each column field and type in the Cost Price and Sell Price.
- Another way is to use the Properties dialog discussed below.
View tab > select List View - Click to view Quantities report showing the same pricing details
Calculate Prices button
The Calculate Prices button greys out if the currently displayed processes are all up to date. If you add another cabinet, change a quantity or dimension of one of the cabinets that you haven't overridden the price for it (in the /), will become available. You will also notice that question marks (?) appear in the costing columns.
Adjusting a price manually will automatically recalculate the Extended Sell price without the button needing to be pressed. If you add another cabinet, change a quantity or dimension of one of the cabinets that you haven't overridden the price for, the 'Calculate Prices' button will become available. After it is pressed, it will grey itself out again.
The Total Price is the total Extended Sell price. Click on the image above to see these prices reflected on the Quantities report.
Delete Item
To delete simply select the item and :-
- the item line will be highlighted (as shown below for 'Freight' item)
- from the right click menu, select 'Clear'
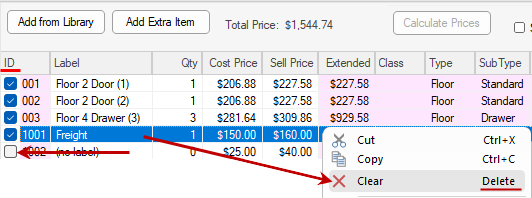
Deselect Item
If an item is not used in Quotes/Invoices, you may want to leave on list but deselect it.
- Simply uncheck the ID checkbox (as shown above for ID 1002)
- You will notice above that 'Total Price' does not include this item's sell price.
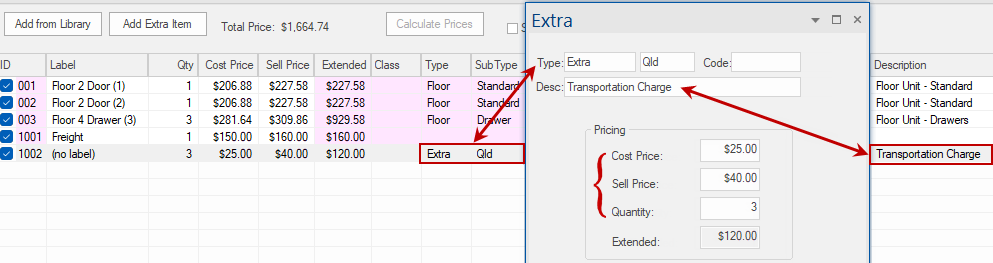
Properties dialog
An alternative way to amend item details is by opening the Item Property.
To open item property, double click on the line item. A dialog will be presented that will look similar to the following image:-
- The dialog title will initially be blank but will reflect any details that are entered in the Type or Code fields (example below Extra)
- As data for the Type, Sub Type and Desc are entered:-
- the cells in List View are populated,
- and the Cost and Sell prices added to the project.
- The unit of measure for the Quantity field is flexible i.e. the Qty of 3 denotes hours.
Click to view Quantities report which shows Type, Sub Type and Description is displayed.
Tutorial 2 Template
A pre-built pricing template is recommend for recurring costs. There are two things to remember about price templates:-
- you can create as many as required
- and apply as many price templates as you like to a single drawing/project.
Recurring items would be created in the same way as one off costs discussed in
Tutorial 1 but without any other costing, such as cabinets.
Create Template
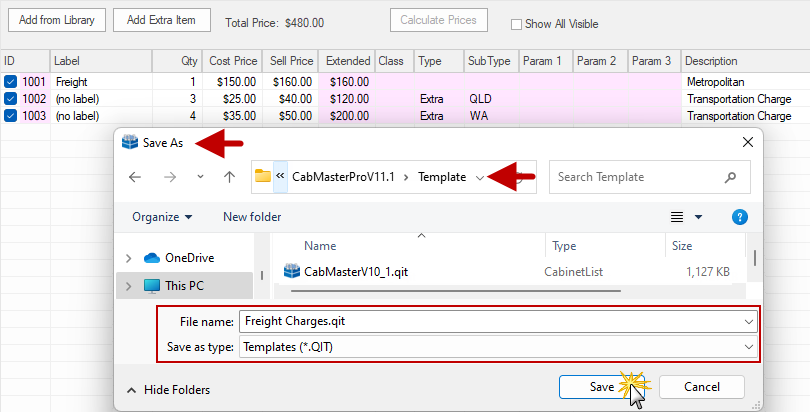
To turn our recurring items into a template we simply select Save As from the File menu. This will allow us to change the format of the file to a template.
In the presented dialog (illustrated below) :-
- from the File Location drop list, select Template
- select the 'Save as type' from the drop list i.e. Templates (*.QIT)
- create a File name e.g. Freight Charges.qit
- click on the Save button
Apply Template
We are now going to illustrate how you apply this template.
In this example we commence with a new drawing but you can apply templates at any stage to the drawing/project.
If you apply more than one price template, any duplicate values will be removed when you merge the templates.
Step 1
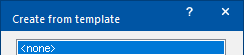
Open a New drawing to clear out the existing template and to commence a new drawing.
- If you are asked to select a template, choose the <none> option. Click OK.
Click to Expand
- With the new drawing open, change the View type to List View.
Step 2
Once the List View is open we are ready to apply the price template we created above.
- From the File menu
- select Prepare > Apply Templates (click on image below)
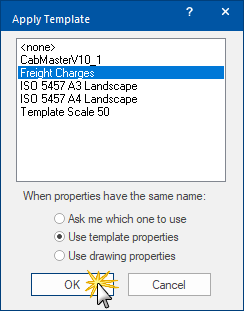
- which will present the following Apply Template dialog.
- Select the template you want to be applied. In this example, Freight Charges.
- Click OK
Click to view File > Prepare
Your List View has now been updated to include the contents of the template.

Apply Multiple Templates
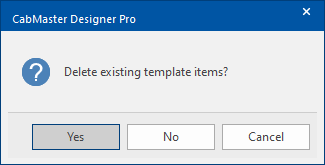
As stated above, you can apply as many price templates as you like to your current drawing/project. Simply repeat Step 2.
You will get the following message. If you want to keep existing template items but apply another template, then select 'No' (i.e. do not delete existing).
See Also